Installing & Developing Locally
This guide is for users who want to install Grow CRM on their local computer, for the purpose of further developing Grow CRM to their needs.
In this guide, you will do the following:
- Install and configure a local webserver (XAMPP)
- Setup MySQL Database
- Install Grow CRM
Installing XAMPP
This is the first and most important step. Grow CRM has many server requirements, which are easily met by the application XAMPP
NOTE: There are processes and configurations that are done by the installation wizard and as such just running php artisan serve on your local folder will not work.
- Download a copy of XAMPP (PHP 7.3.x) version from their website https://www.wampserver.com/en/
- Run the installation file and finish
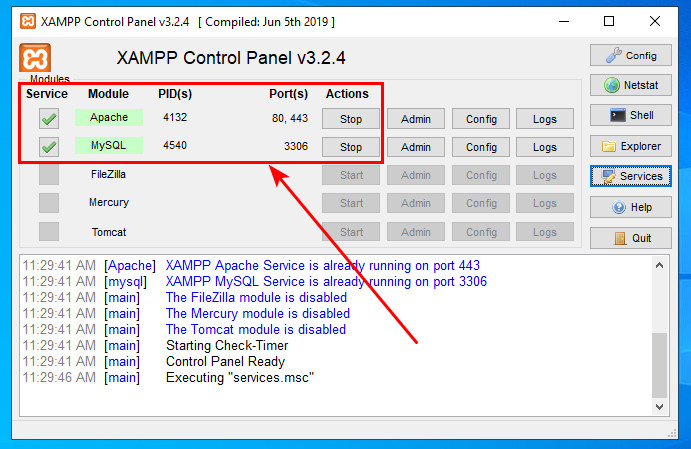
- Startup XAMPP and make sure Apache & MySQL are running

Create A MySQL Database
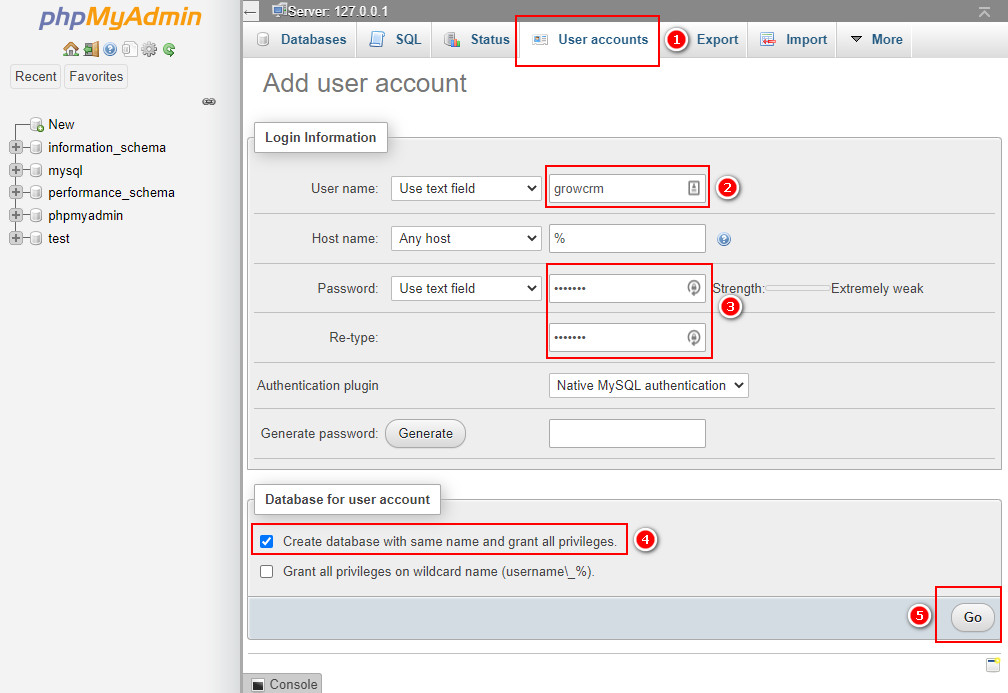
Now that you have installed XAMPP, open your browser to the url shown below
http://localhost/phpmyadmin/index.php?route=/server/privileges&adduser=1
- Fill in the form, as shown below.
- This will let you create a MySQL user, complete with a new database

INSTALL GROW CRM
You can now install Grow CRM.
- Unzip your Grow CRM package
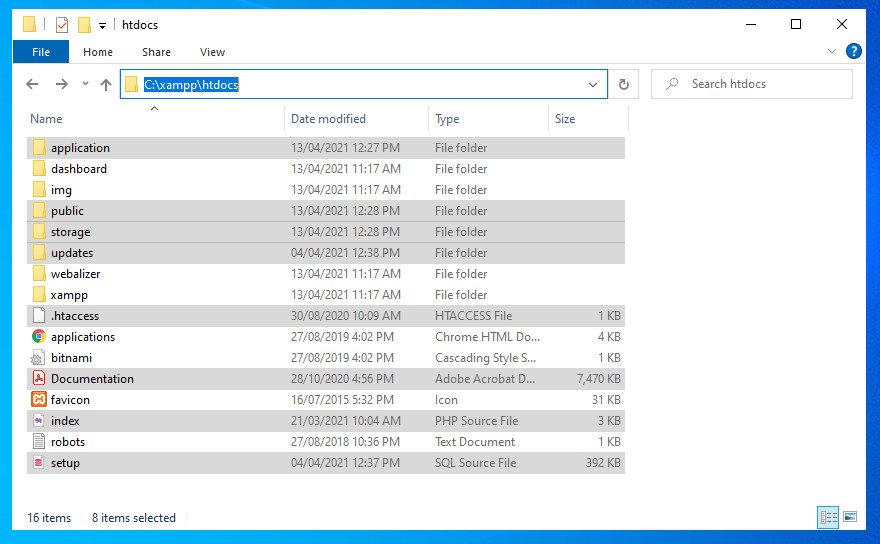
- Copy and paste the contents into the htpdocs folder of your XAMPP installation. For windows users, the folder is usually C:\xampp\htdocs
- See image below for an example

- Open your browser to http://localhost
- Follow the installation wizard. You will be asked for the MySQL database details (which you created previously)
You should now have Grow CRM installed and working
You will also now be able to run php artisan command from within your IDE

