Estimate Automation
Estimate Automation
What is Estimate Automation?
Estimate Automation is a workflow feature that executes predefined actions when a client accepts an estimate. When enabled, the system can automatically create new projects with tasks, generate invoices with specified due dates, and send email notifications to clients—all without manual intervention.
This automation ensures that accepted estimates immediately transition into actionable projects and billable invoices, reducing delays and improving operational efficiency.
Accessing Estimate Automation Settings
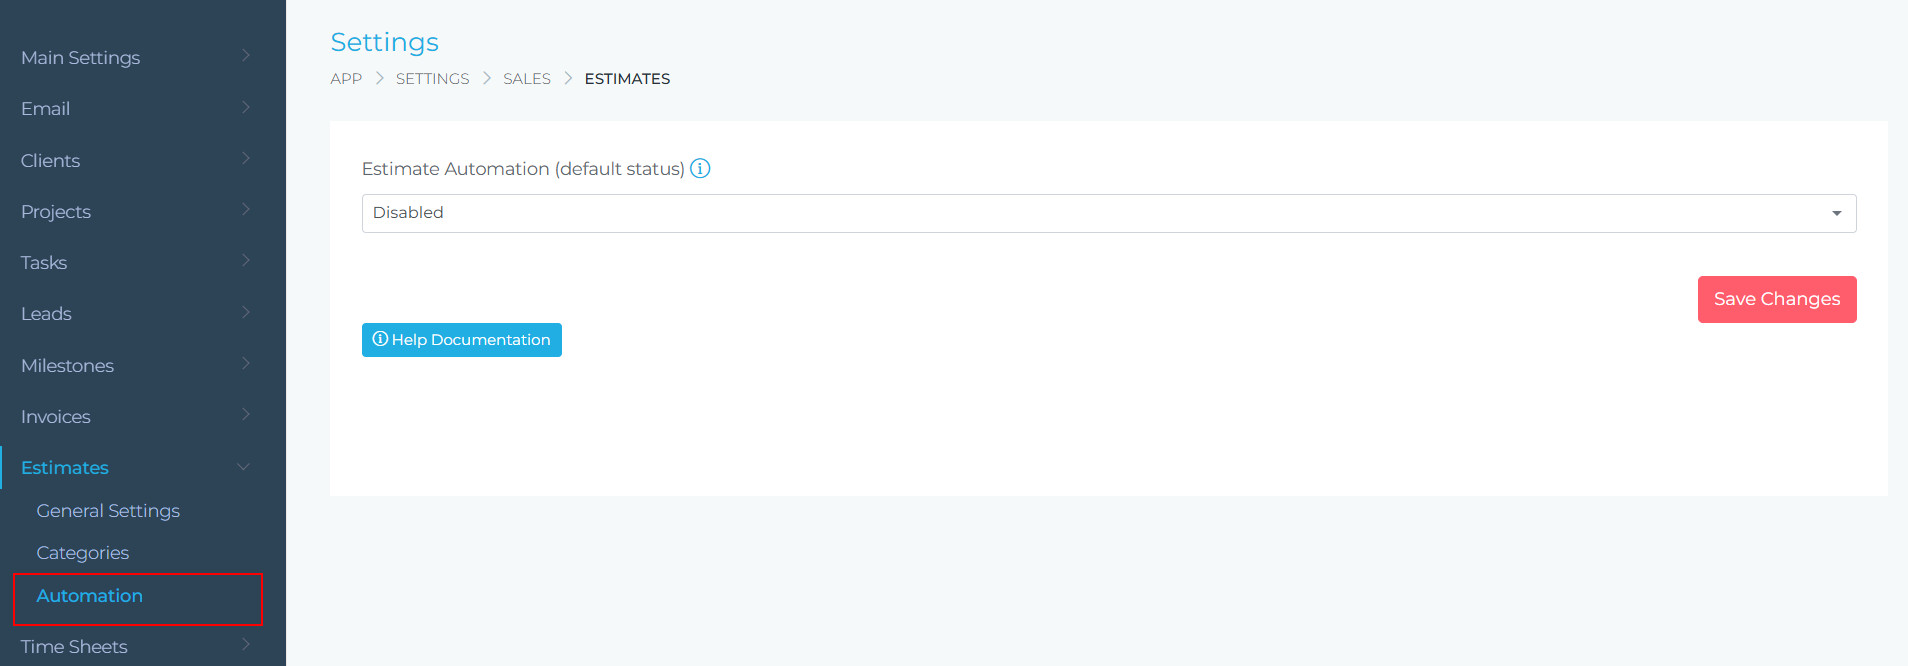
From your dashboard, click on App in the main menu, then select Settings. Navigate to Estimates, and finally select Automation from the sidebar.
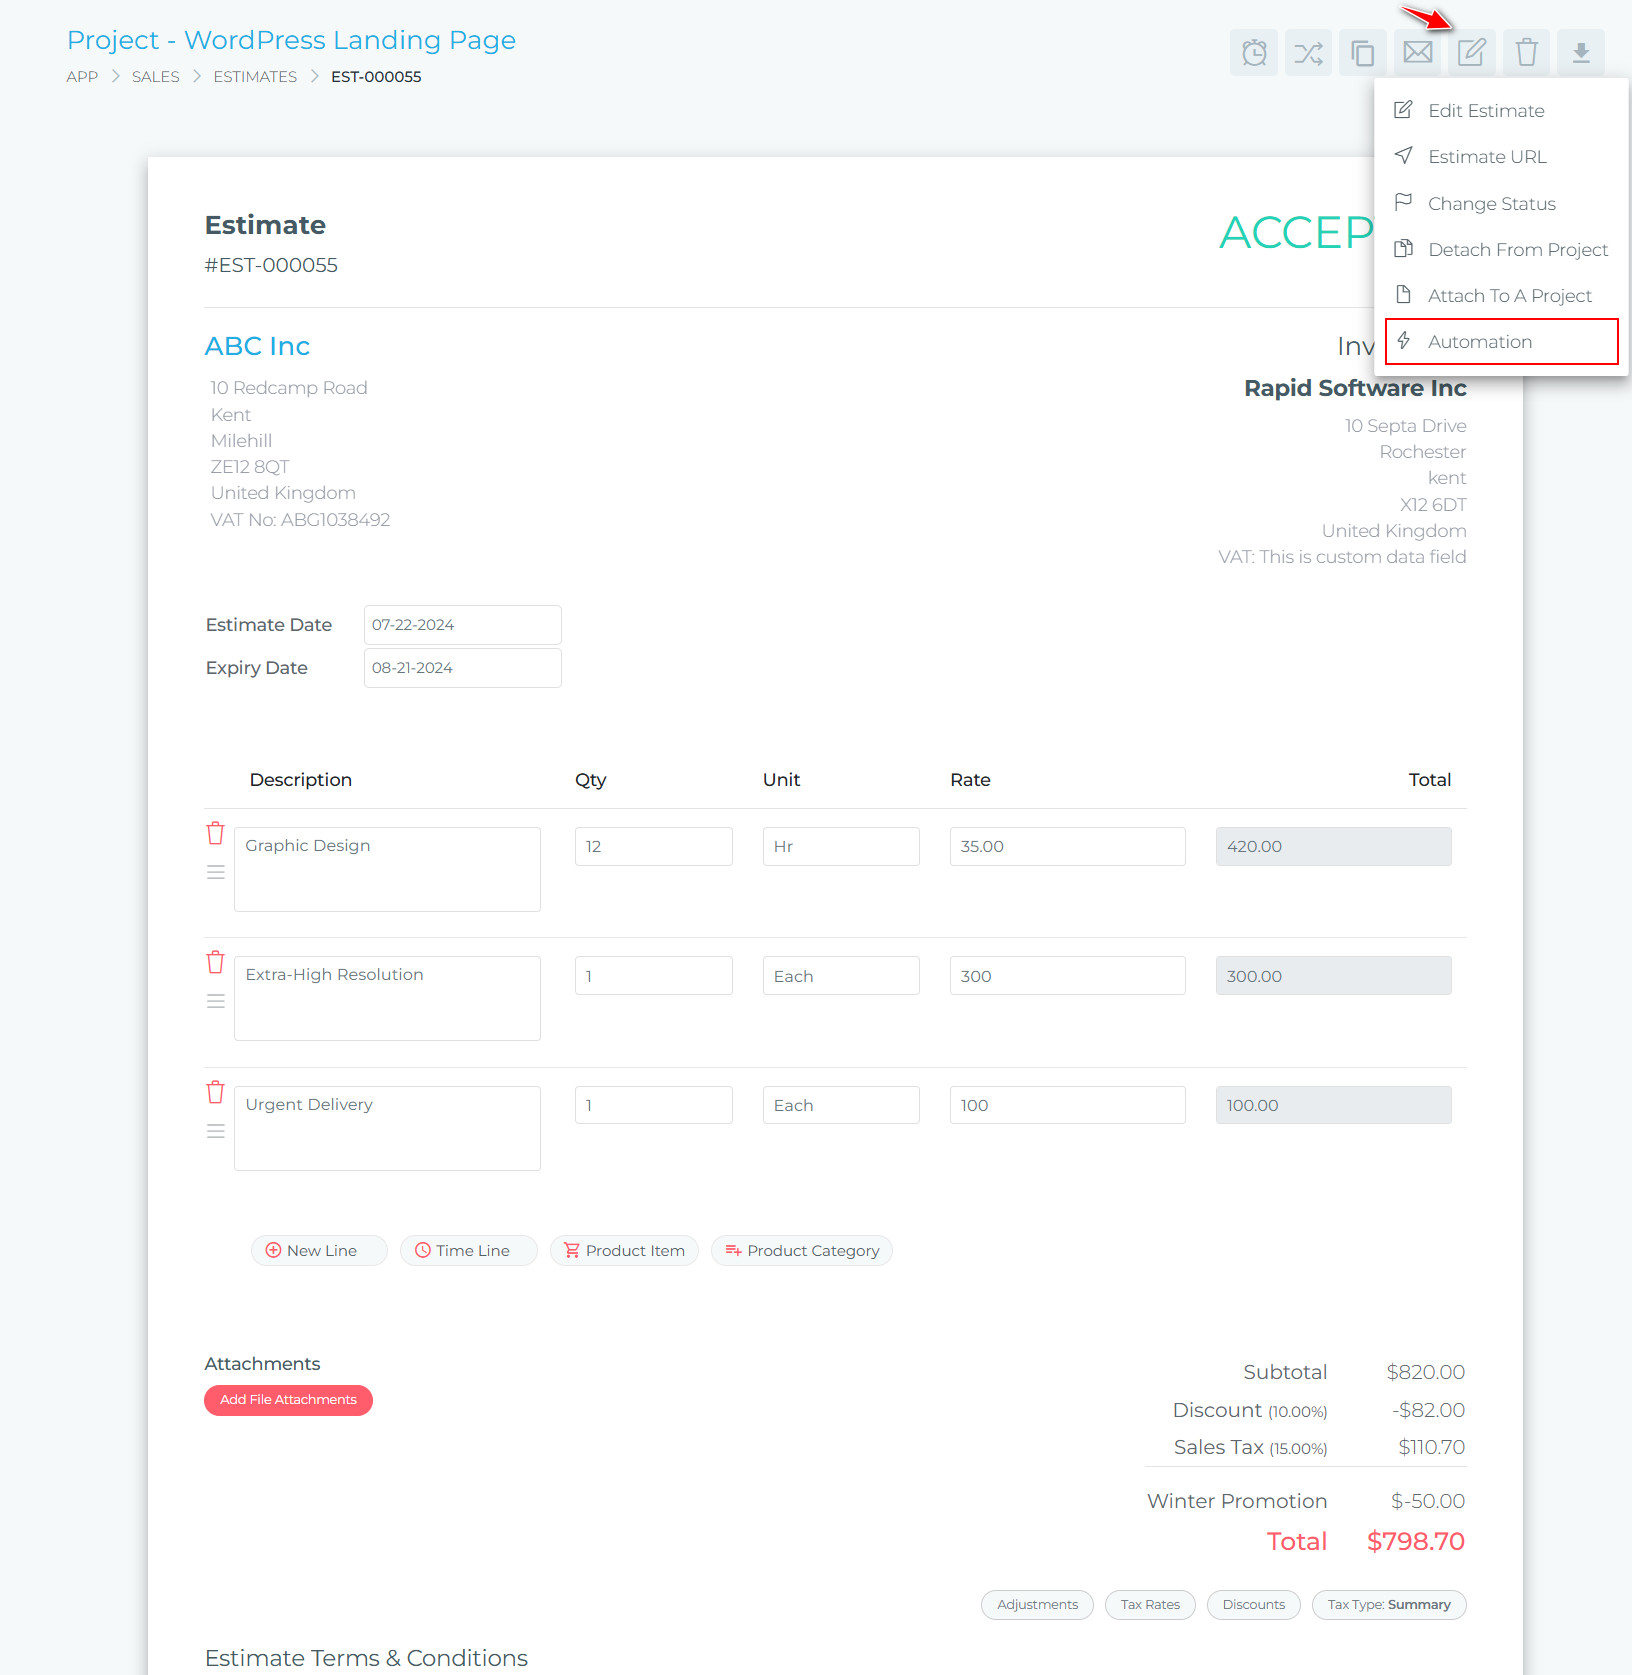
You can also configure automation for individual estimates. Open the estimate and click the edit icon and then select automation
Configuring Default Automation Settings
Setting Default Automation Status
At the top of the automation settings page, you’ll find a dropdown to control the default automation behavior:
- Enabled: Automation will run by default for all new estimates
- Disabled: Automation is turned off by default (can be enabled per estimate)
Automation Options
Automation Option 1: Create a New Project
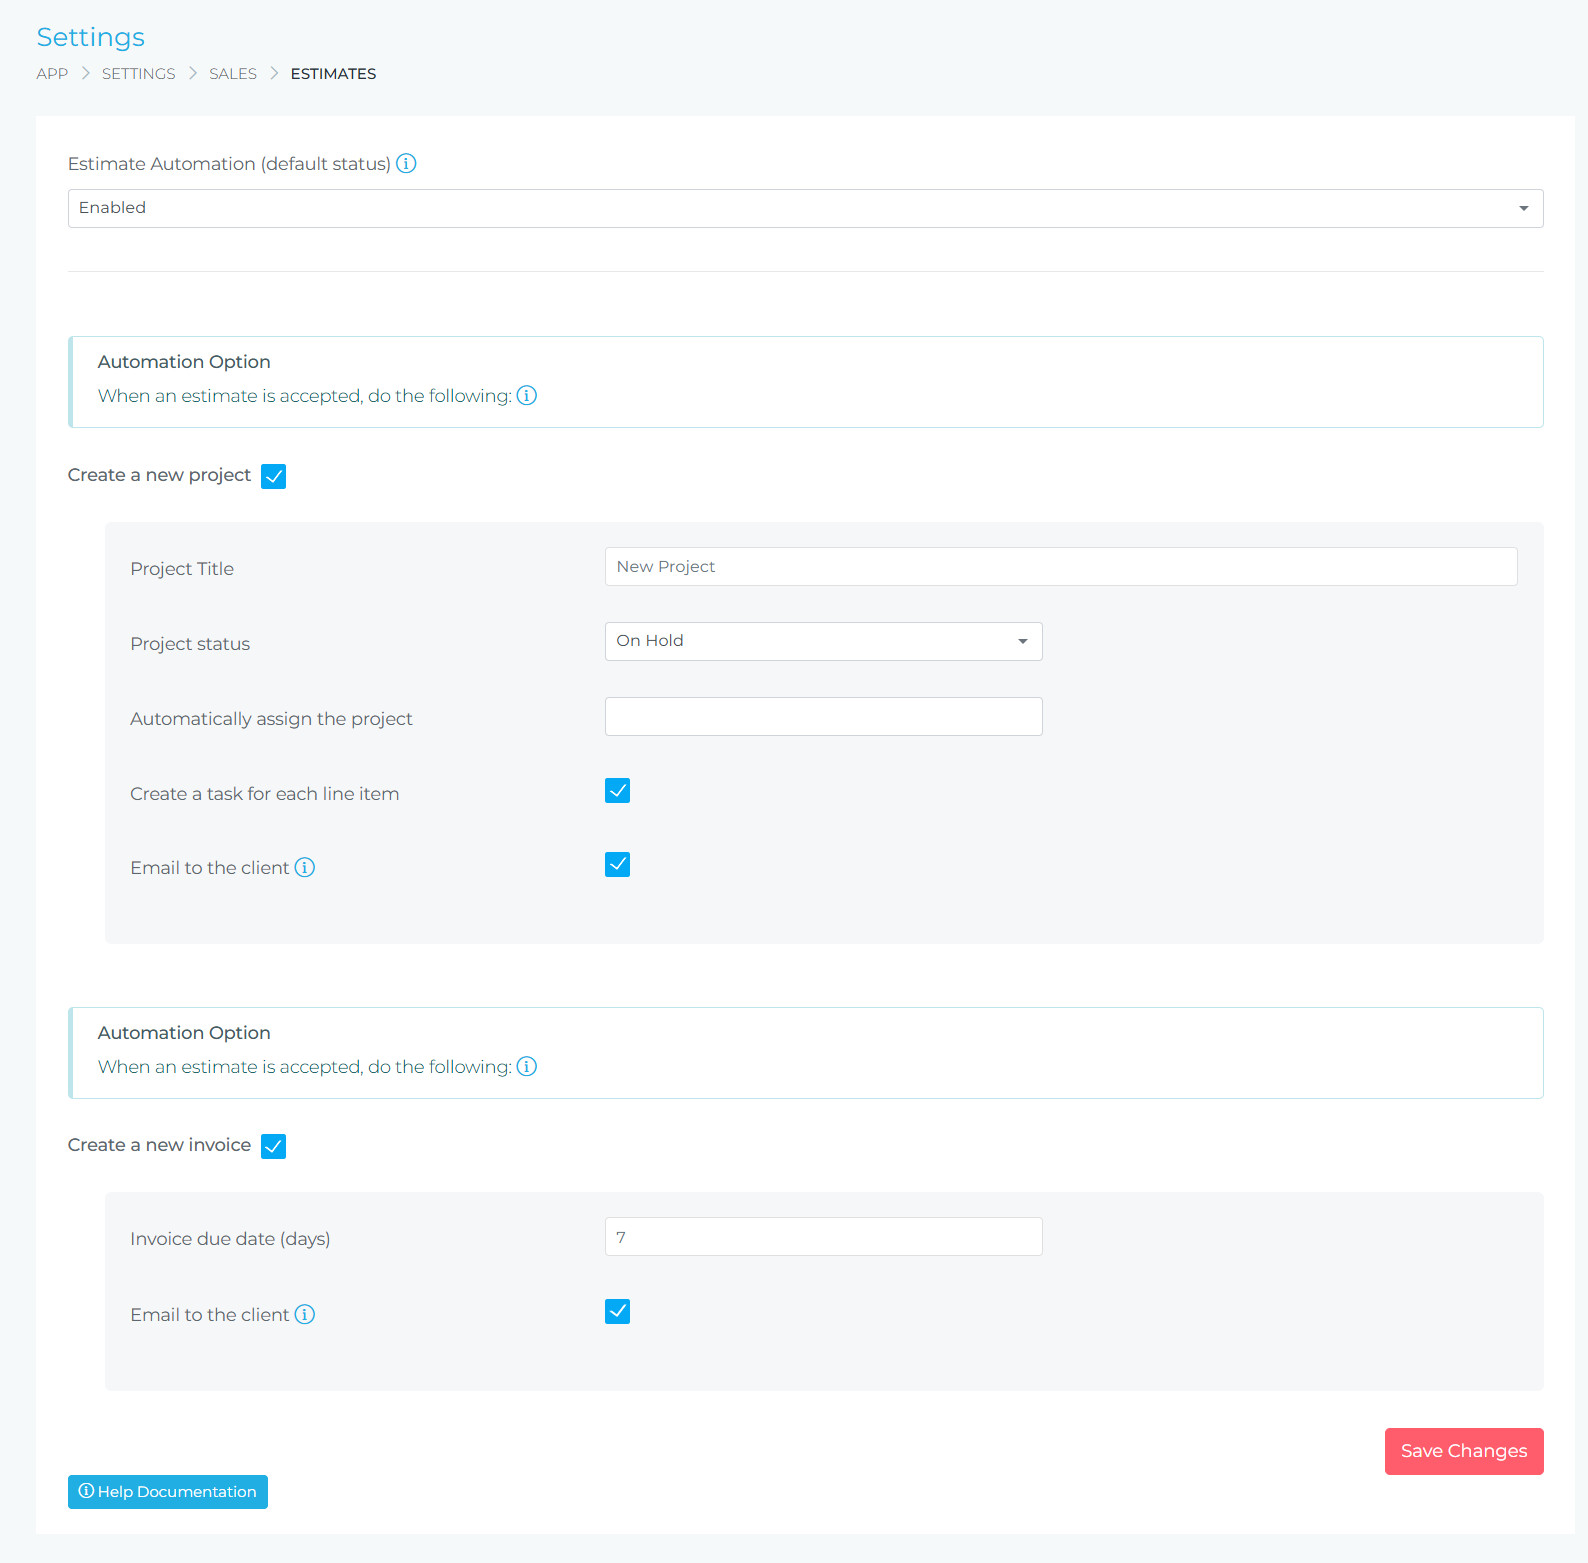
When an estimate is accepted, the system can automatically create a new project. Enable this by checking the “Create a new project” option.
Project Creation Settings
Enter a default title for automatically created projects. You can use placeholders or a standard naming convention.
Select the initial status for newly created projects (e.g., “On Hold”, “In Progress”). This determines how the project appears in your workflow.
Specify a team member to automatically assign as the project owner or manager.
When enabled, each line item from the estimate will be converted into a separate task within the project, making it easy to track work completion.
Enable this to automatically copy any files attached to the estimate over to the newly created project.
When checked, an email notification will be sent to the client informing them that their project has been created.
Automation Option 2: Create a New Invoice
Enable automatic invoice creation by checking the “Create a new invoice” option. This converts the accepted estimate into a billable invoice.
Invoice Settings
Specify the number of days after invoice creation when payment should be due. For example, entering 7 means invoices will be due 7 days from creation.
When enabled, invoices will be automatically emailed to the client upon creation, ensuring immediate notification.
Per-Estimate Automation Override
Individual estimates can have their own automation settings that override the default configuration. This is useful when specific estimates require different handling.
Navigate to the estimate you want to configure.
Click the three dots menu in the top-right corner and select Automation.
Adjust the automation status and options specific to this estimate. These settings will override the default configuration.
How It Works
Workflow Example
- You create an estimate with line items and send it to your client
- Client reviews and accepts the estimate
- Automation triggers immediately:
- System creates a new project with the specified title and status
- Each estimate line item becomes a task (if enabled)
- Project is automatically assigned to designated team member
- Estimate attachments are copied to the project (if enabled)
- New invoice is generated from the estimate
- Invoice due date is set based on configuration
- Email notifications are sent to client (if enabled)
- Your team can immediately begin work on the project
- Client receives invoice and can proceed with payment
Best Practices
- Set clear project status defaults: Use “On Hold” for projects awaiting client confirmation or “In Progress” for immediate work
- Enable task creation: Converting estimate line items to tasks provides clear work breakdowns for your team
- Configure appropriate due dates: Align invoice due dates with your standard payment terms (e.g., Net 7, Net 30)
- Use email notifications: Automatic emails keep clients informed and speed up payment processing
- Assign projects automatically: Designate project managers or team leads to ensure accountability from the start
- Test with sample estimates: Create test estimates to verify automation works as expected before using with real clients
- Review per-estimate overrides: For high-value or special projects, consider customizing automation settings
Troubleshooting
Check that:
- Estimate automation is set to “Enabled” in default settings
- “Create a new project” option is checked
- The estimate has been marked as “Accepted”
- Per-estimate automation hasn’t been disabled
Verify that:
- “Create a new invoice” option is enabled
- The estimate contains line items with pricing
- Estimate status is “Accepted”
Confirm that:
- “Email to the client” checkboxes are enabled
- Client email address is correct in their profile
- System email settings are properly configured
- Emails aren’t being caught by spam filters
Ensure:
- “Create a task for each line item” is checked
- Estimate contains line items (not just total amount)
- Project creation automation is enabled
Need Help?
For additional assistance with Estimate Automation or other features, please visit our support documentation or contact our support team.