Customizing Grow CRM’s Appearance (CSS)
This guide explains how to customize the look and feel of your Grow CRM installation using CSS. There are two methods available for applying custom CSS styles, giving you flexibility in how you manage your customizations.
Prerequisites
- Basic knowledge of CSS
- Access to your Grow CRM installation
- (Optional) FTP access or web hosting control panel access
Method 1: Using the Theme Settings Interface
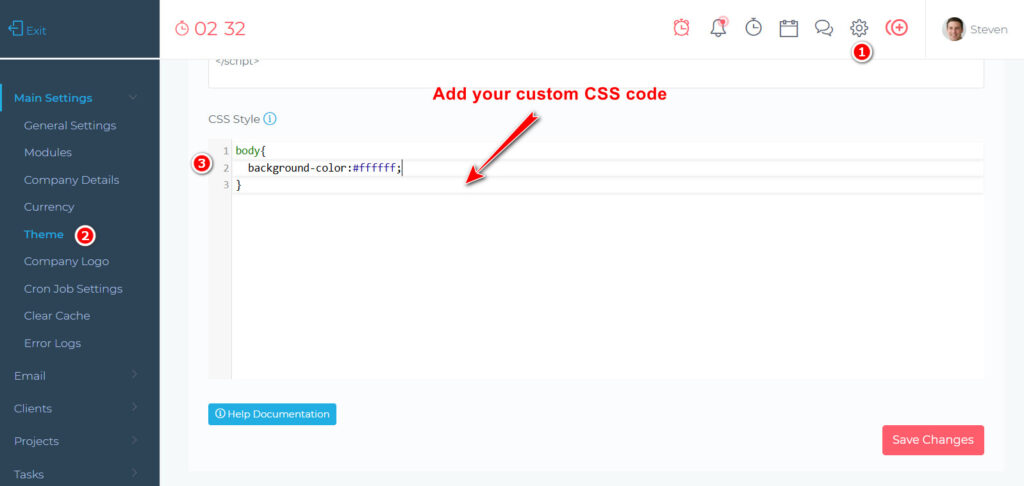
- Navigate to
App > Settings > Themein your Grow CRM dashboard - Locate the CSS input area
- Enter your custom CSS code
- Click “Save Changes” to apply your modifications
This method is ideal for:
- Making quick style changes
- Testing different CSS modifications
- Users who prefer working directly in the application interface
- Situations where you don’t have direct file system access
Method 2: Editing the Custom CSS File
- Locate the custom CSS file at:
/public_html/public/css/custom.css - Access this file through your:
- Web hosting control panel, or
- FTP client
- Add your custom CSS code to this file
- Save the file
- Clear your browser cache to see the changes
This method is recommended for:
- Making permanent style changes
- Managing larger amounts of CSS code
- Maintaining version control of your customizations
- Teams with multiple developers
Best Practices
- Always backup your CSS before making changes
- Test your changes in a development environment first
- Use browser developer tools to inspect elements before writing CSS
- Comment your CSS code for better maintainability
- Keep a record of your customizations for future reference
Important Notes
- Custom CSS changes will persist through Grow CRM updates
- Custom styles may need adjustment after major Grow CRM updates
- Your changes should not modify core functionality
- Some elements may require !important to override default styles
Example Customizations
Here are some common customization examples:
/* Changing the main background color */
body {
    background-color: #f5f5f5;
}

/* Modifying button colors */
.btn-primary {
    background-color: #007bff;
    border-color: #007bff;
}

/* Customizing header appearance */
.header-main {
    box-shadow: 0 2px 4px rgba(0,0,0,0.1);
}
Using Google Chrome DevTools for CSS Customization
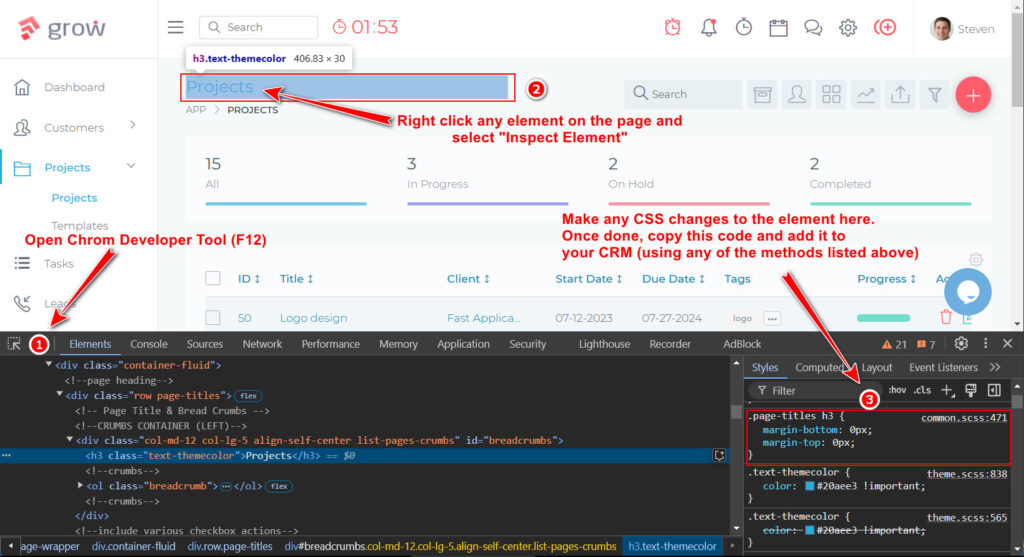
Chrome DevTools is an essential tool for identifying elements and their styles before making customizations to your Grow CRM installation.
Opening Chrome DevTools
- Right-click on any element you want to inspect and select “Inspect”, or
- Use keyboard shortcuts:
- Windows/Linux: Press
Ctrl + Shift + IorF12 - macOS: Press
Cmd + Option + I
- Windows/Linux: Press
Inspecting Elements
- Use the Element Selector (cursor icon) in DevTools or press
Ctrl + Shift + C(Windows/Linux) orCmd + Shift + C(macOS) - Click on any element on the page to inspect it
- The Elements panel will show the HTML structure
- The Styles panel on the right shows all CSS rules applied to the selected element
Finding the Right Selectors
- When you select an element, look at its HTML in the Elements panel:
- Check for
classandidattributes - Note the element’s position in the HTML hierarchy
- Look for unique attributes that can help target the element
- Check for
Example of element inspection:
<h3 class="page-titles">
    Projects
</h3>- In the Styles panel, you’ll see:
- All CSS rules affecting the element
- You can make changes in this panel. You can then copy the code and add it to your CRM (using the methods listed above)
Troubleshooting
If your CSS changes aren’t appearing:
- Clear your browser cache
- Verify the CSS syntax is correct
- Check if the selectors are specific enough
- Ensure the file permissions are correct (for Method 2)
- Confirm the changes were saved successfully