Import Leads
How to Import Leads into Grow CRM
This guide will walk you through the process of importing multiple leads into Grow CRM using either CSV or Excel files, allowing you to quickly populate your sales pipeline with potential customers.
Overview
Grow CRM’s leads import feature allows you to add hundreds of leads in just a matter of seconds. This functionality is particularly valuable when migrating from another system or when you need to add a large number of prospects to your sales pipeline at once.
Import Process
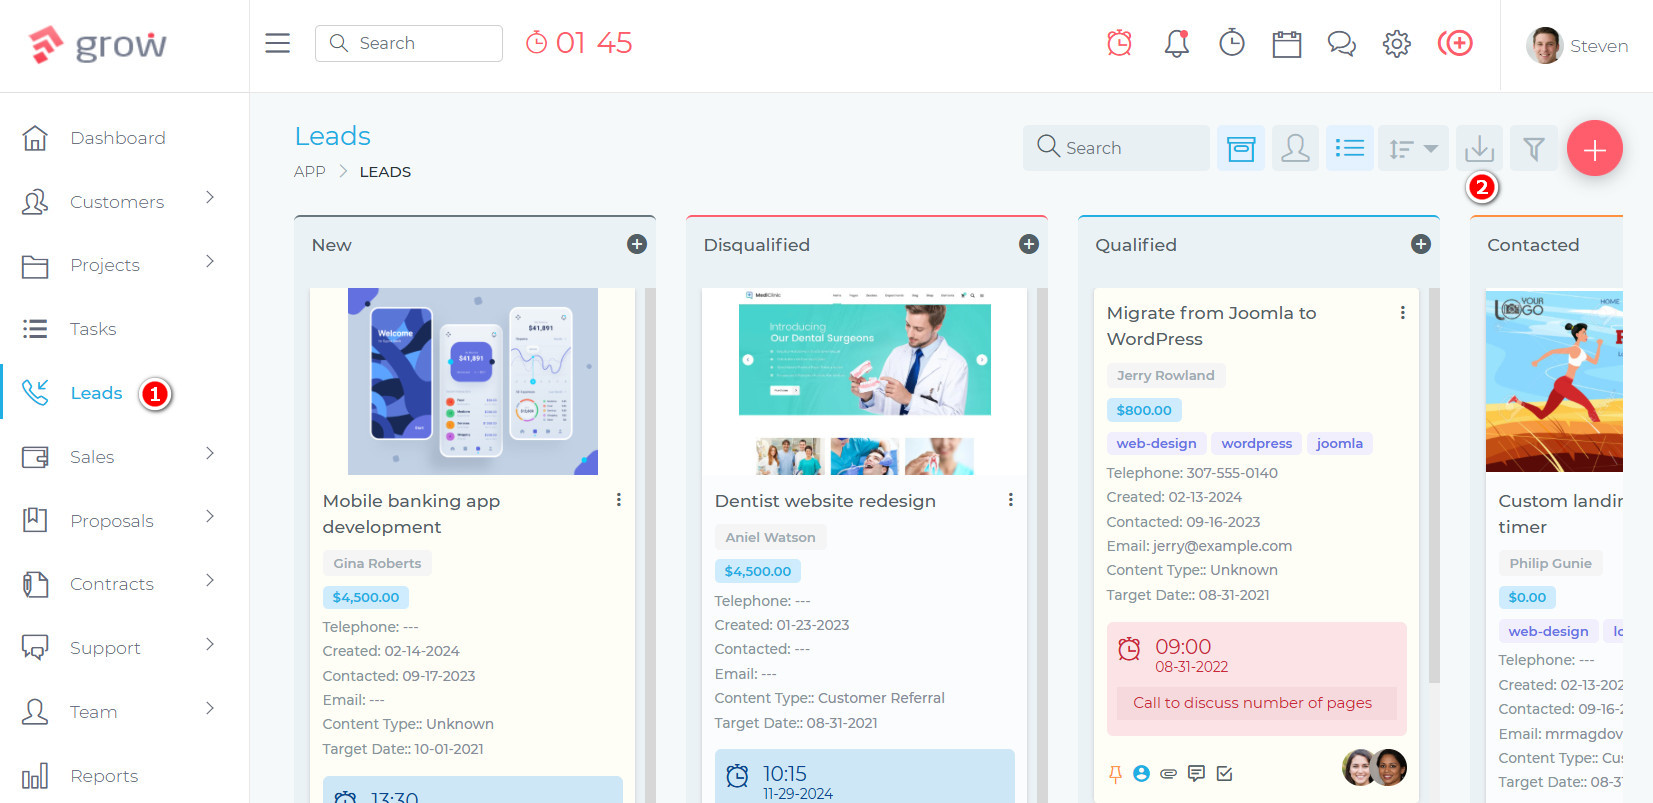
Click on “Leads” in the main menu, then locate and click on the “Import Leads” icon in the leads page.
Once you click the Import Leads icon, a modal window will appear with further instructions:
- Download the provided sample files (CSV or XLSX format) to see the required format
- Fill the template with your lead data, following the exact format
- Drag and drop your completed file onto the designated area
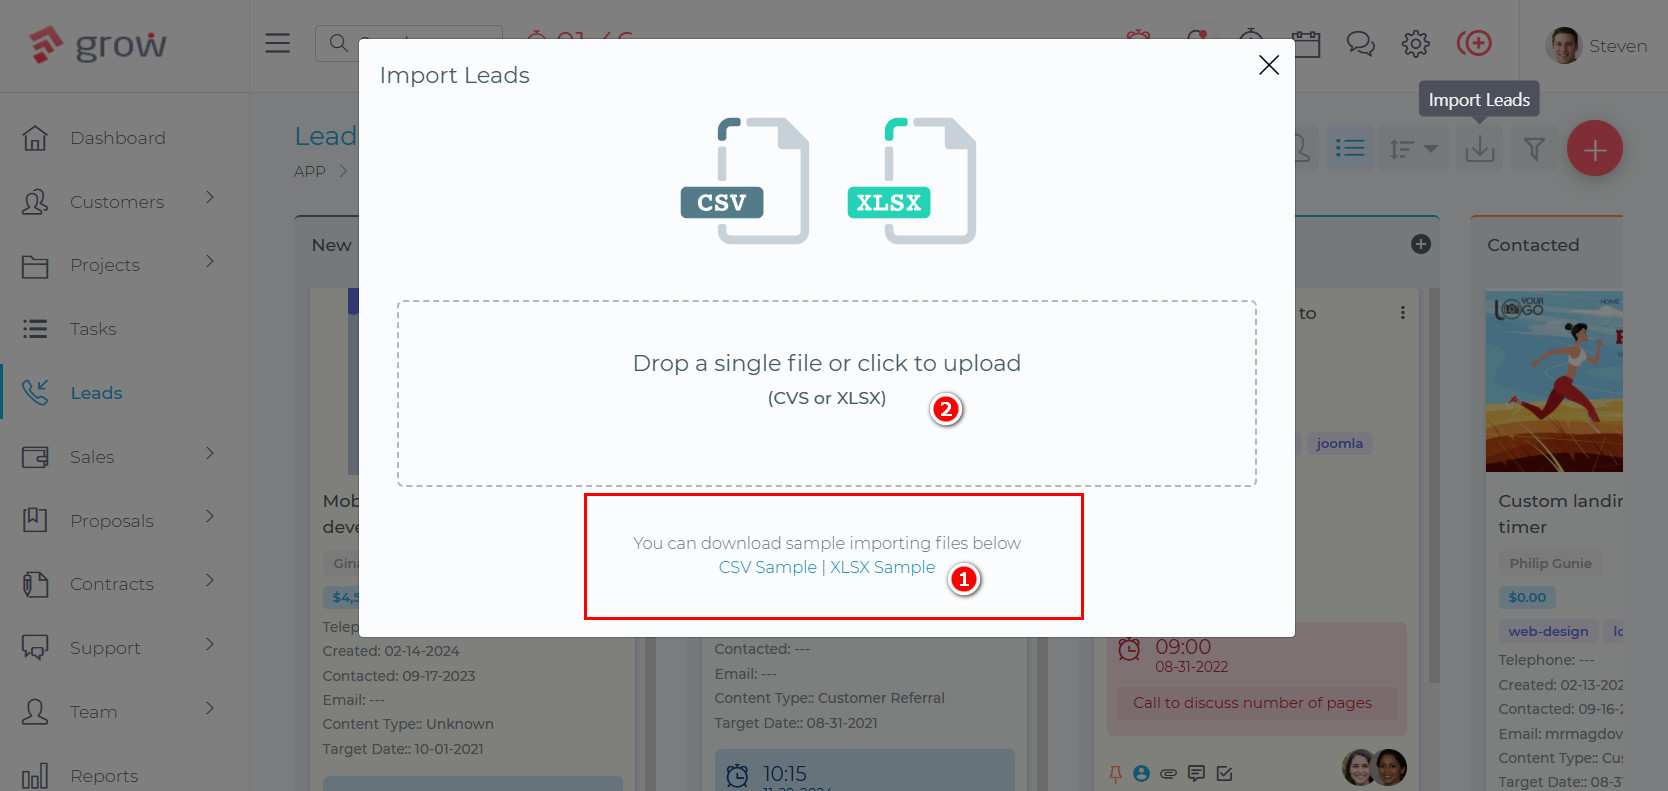
After uploading your file, the system will process the data and display the results:
- Number of leads successfully imported
- Any errors encountered during the import process
This completes the import process. Each imported lead will be available in your leads dashboard for immediate follow-up.
File Format Requirements
The system accepts two file formats:
- CSV (Comma Separated Values) – A simple text file format that can be opened and edited in various applications, including Excel and Google Sheets
- XLSX (Excel) – Microsoft Excel’s native file format
Leveraging Lead Import for Sales Success
Properly importing leads is just the first step in an effective sales process. Once imported, you can:
- Assign leads to specific team members for follow-up
- Categorize leads by source, status, or other criteria
- Track lead progression through your sales pipeline
- Convert qualified leads to clients with a streamlined process
Troubleshooting Common Issues
File Format Errors
- Ensure column headers match exactly as shown in the template
- Do not add or remove columns from the template
- Check for special characters that might cause parsing issues
Data Format Issues
- Ensure dates are in the correct format
- Phone numbers should not contain special formatting characters
- Email addresses must be in valid format
Next Steps After Import
Once you’ve successfully imported your leads, consider these important follow-up activities:
- Review lead assignments to ensure proper distribution among your sales team
- Verify lead categorization and statuses
- Schedule regular reviews of your lead pipeline to maintain data quality