Project Automation
What is Project Automation?
Project Automation is a workflow feature that triggers specific actions when a project reaches completion status. When enabled, the system automatically generates invoices based on accepted estimates, saving time and improving cash flow management.
This automation ensures that completed work is promptly invoiced without manual intervention, reducing delays between project completion and payment collection.
Accessing Project Automation Settings
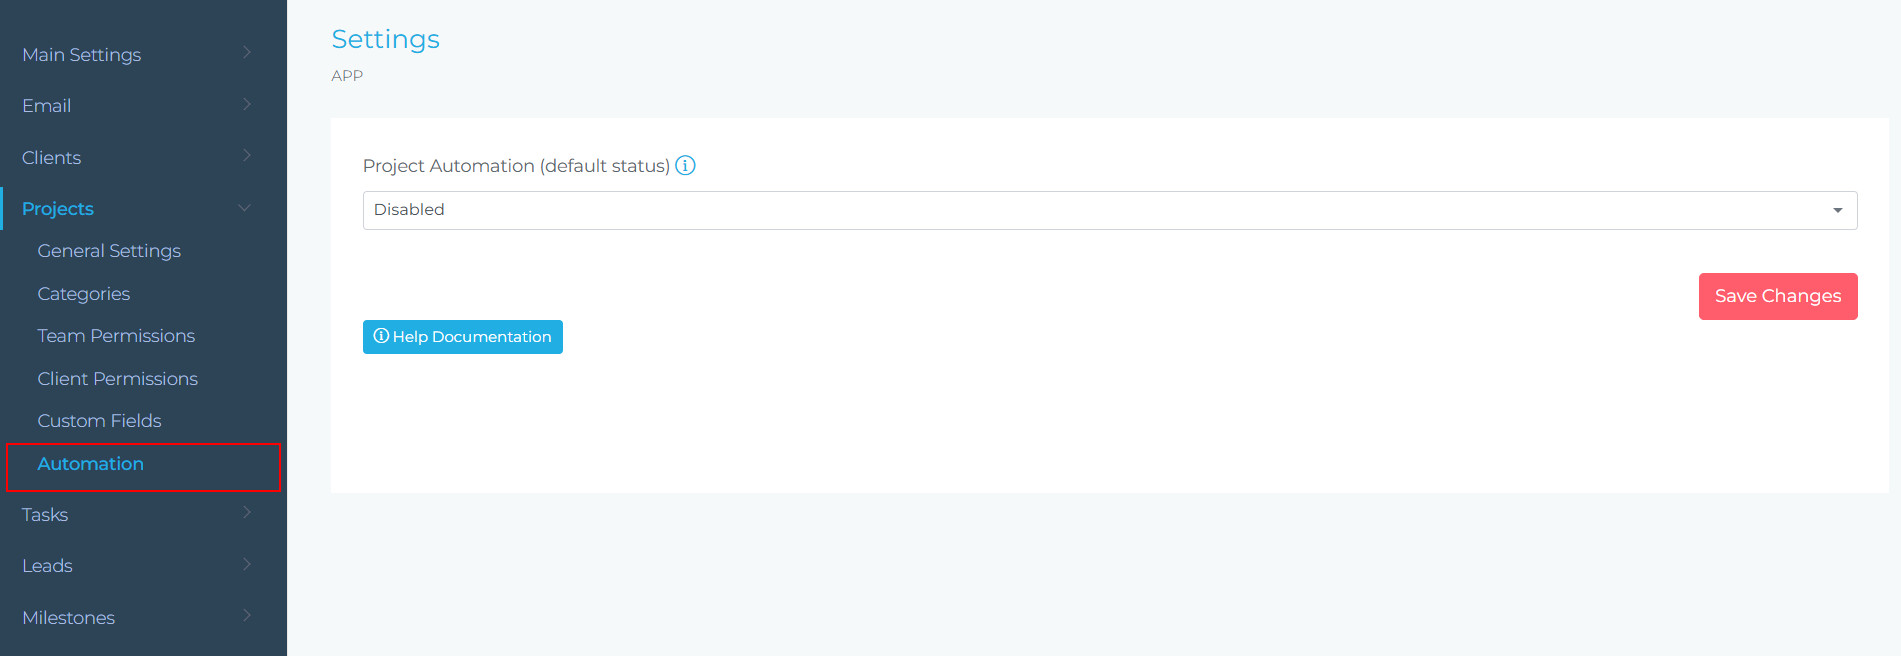
From your dashboard, click on App in the main menu, then select Settings.
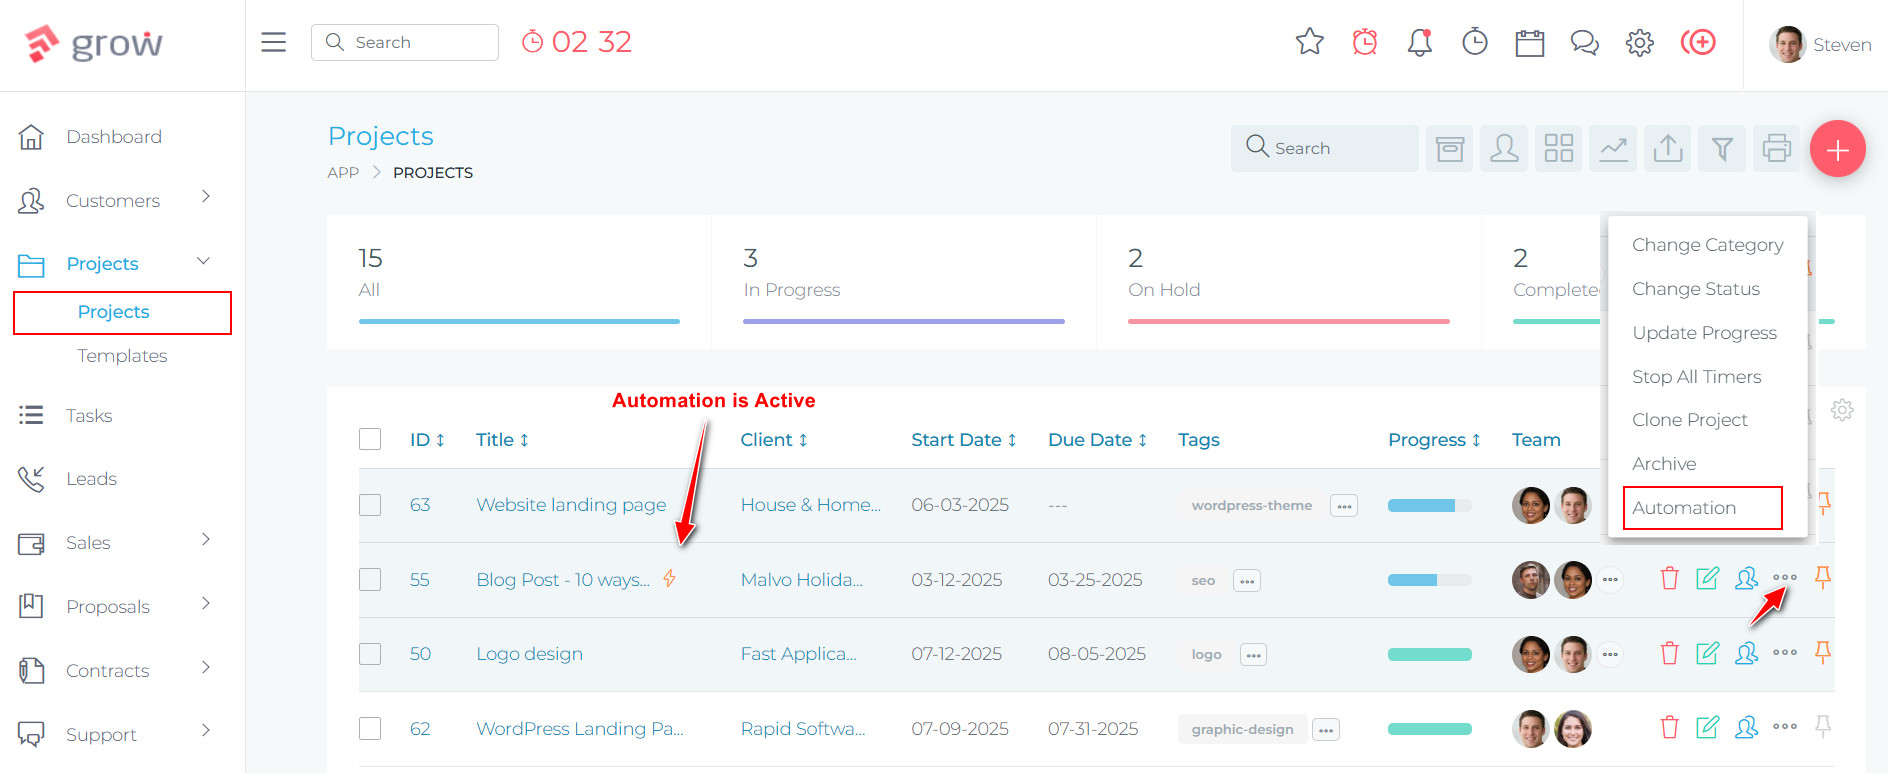
Alternatively, you can access automation settings directly from the projects page. Click on the three dots menu next to any project, then select Automation.
Configuring Project Automation
Enabling/Disabling Automation
At the top of the automation settings page, you’ll find a dropdown menu to control the default automation status:
- Enabled: Automation will run by default for all projects
- Disabled: Automation is turned off by default (you can enable it per project)
Automation Options
Automatic Invoice Creation
When a project is marked as completed, the automation can create invoices automatically. Enable this by checking the “Automatically create invoices for the project” option.
Invoice Creation Options
When enabled, all accepted estimates associated with the project will be converted into invoices automatically.
This option allows you to exclude estimates that are still in draft status from being converted to invoices.
Enable this to prevent declined estimates from being included in the invoice creation process.
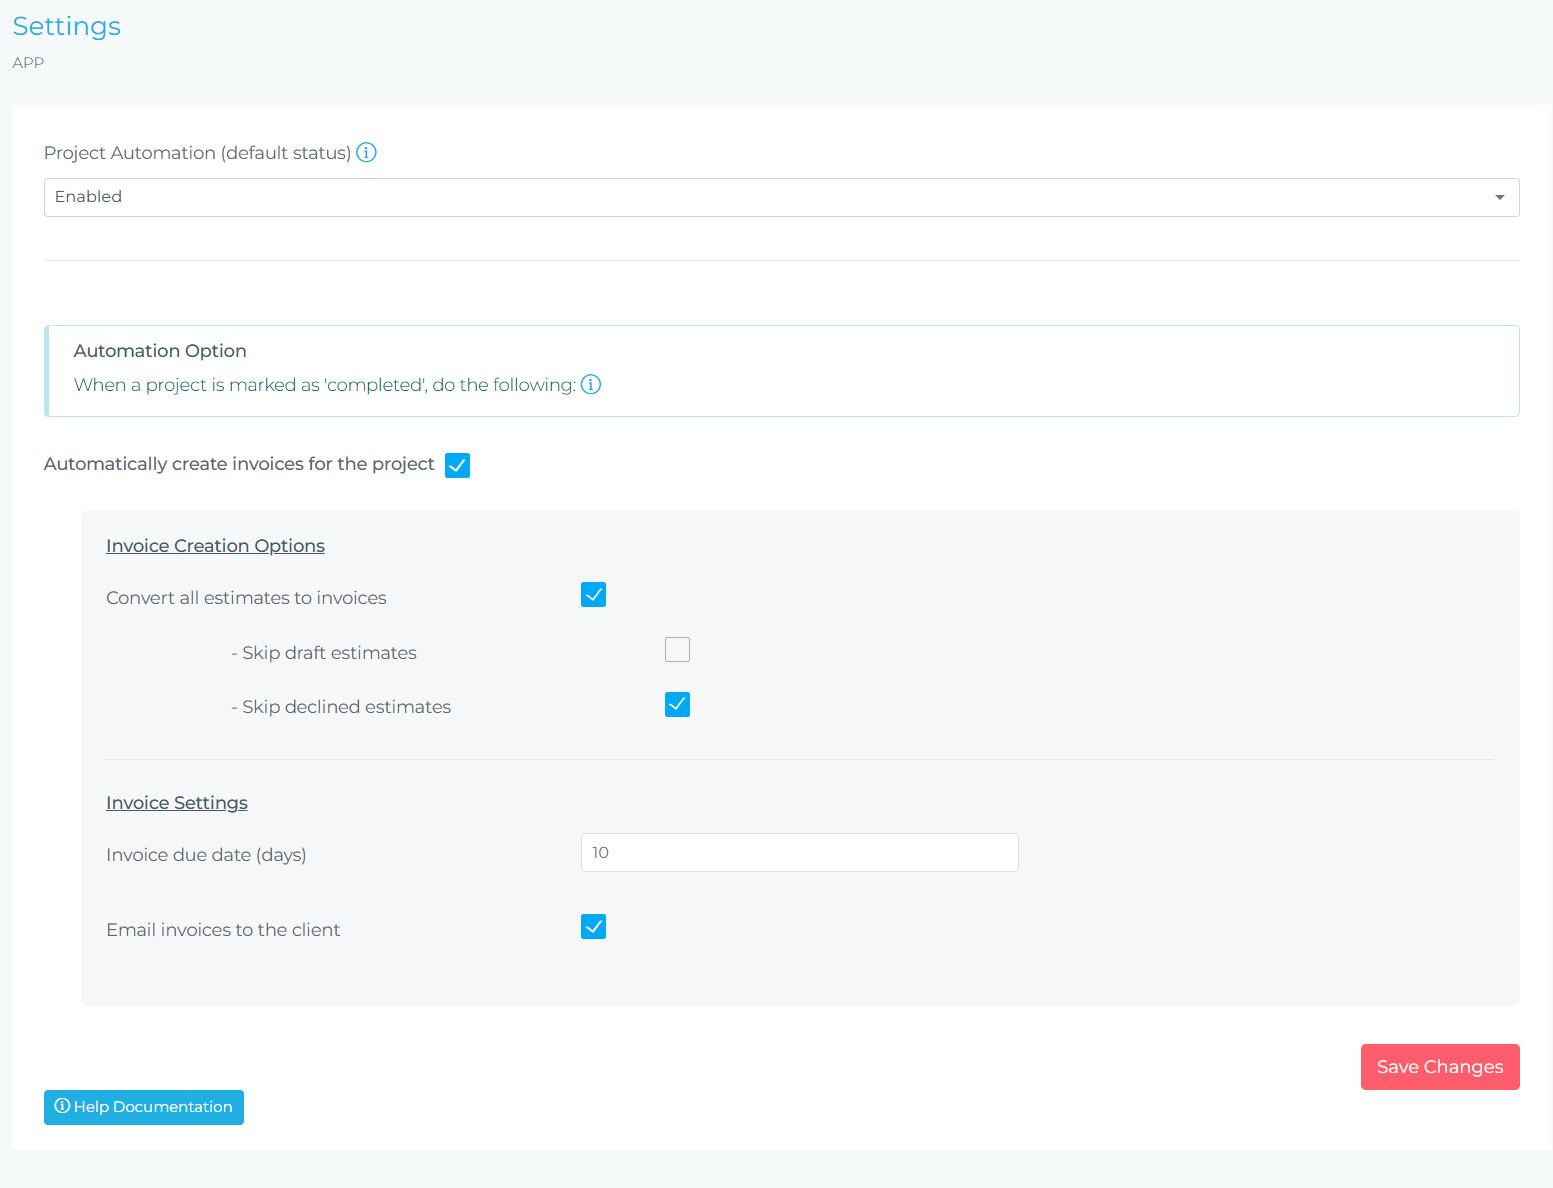
Invoice Settings
Invoice Due Date
Specify the number of days after invoice creation when payment should be due. For example, entering 10 means invoices will be due 10 days from the creation date.
- Project completed: January 1st
- Invoice created: January 1st
- Invoice due date setting: 10 days
- Invoice due: January 11th
Email Invoices to Client
When enabled, invoices will be automatically emailed to the client upon creation. This ensures immediate notification and faster payment processing.
How It Works
Workflow Example
- You create estimates for a project and send them to your client
- Client accepts the estimates
- Your team completes the project work
- You mark the project as “Completed”
- Automation triggers:
- System converts accepted estimates to invoices
- Skips any draft or declined estimates (if configured)
- Sets invoice due date based on your settings
- Emails invoices to client (if enabled)
- Client receives invoice and can proceed with payment
Best Practices
- Set appropriate due dates: Consider your typical payment terms when setting the due date period (e.g., Net 10, Net 30)
- Enable email notifications: Automatic emailing ensures clients receive invoices promptly, improving cash flow
- Skip declined estimates: This option prevents confusion by ensuring only accepted work is billed
- Review before completion: Check that all estimates are properly marked (accepted/declined) before marking projects complete
- Test the workflow: Create a test project to familiarize yourself with how automation works
Troubleshooting
Check that:
- Project automation is set to “Enabled”
- “Automatically create invoices” option is checked
- The project has accepted estimates
- Draft/declined estimates aren’t blocking the process if those options are enabled
Verify that:
- “Email invoices to the client” is checked
- Client email address is correctly entered in their profile
- Your email settings are properly configured in the system
Review your settings for “Skip draft estimates” and “Skip declined estimates” to ensure only appropriate estimates are being processed.
Need Help?
For additional assistance with Project Automation or other features, please visit our support documentation or contact our support team.