Create Projects
Grow CRM allows you to easily manage your projects. You are able to create projects, which you, your team, and your client, are all be able to share information and collaborate.
Creating A Project
You can create a new project by clicking on the (1) Quick Add icon or by clicking on the (2) Add Project Button.

Basic Mandatory information
-
- Project Title*
- Client*
- Start Date*
Optional information
-
- Deadline
- Assigned users
- Project Manager
- This user will have admin-level access to the project. They will be able to edit all the project’s information and settings. They will also be able to view all user’s tasks, assign users to tasks. The project manager is not able to delete the project.
- Billing information
- This allows you to specify how the project will be billed. The available options are:
- Fixed Billing
- Hourly Billing
- Estimated Hours enable you to monitor your working hours against what you have allowed for.
- Estimated Costs enable you to monitor your expenditure against what you have budgeted for.
- This allows you to specify how the project will be billed. The available options are:
- Project Description
- Assigned Users Permissions
- You are able to specify if team members can collaborate on tasks. This means they will be able to view each other’s tasks and also work within the tasks (commenting, attaching files, etc)
- Client Project Permissions
- You are able to specify the level of access the client will have on the project:
- View Tasks
- Tasks Participation
- The client will be able to comment, attach files, complete checklist, etc, within a task
- Create Tasks
- The client will be able to create new tasks for the project
- View Time Sheets
- View Expenses
- You are able to specify the level of access the client will have on the project:
- Project Progress
- You can set the progress to be calculated automatically (based on the completed tasks) or you can set it to be updated manually (you will be able to set the progress yourself)
- Category
- You can create categories via the settings dashboard. Categories can be anything that allows you to properly sort your projects (e.g. Design, Urgent, Web Development, etc)
- Tags
- Tags can be any text that allows you to easily identify or highlight important information about the project.
* Required information
Editing A Project
To edit a project, click on the Edit Icon, as shown in the image below:

Deleting A Project
To delete a project, click on the Delete Icon, as shown in the image below:

When you delete a project, all the items/resources linked to that project will also be deleted. The list below highlights some of the items that will be deleted.
- Invoices
- Tasks
- Files
- Comments
- etc etc
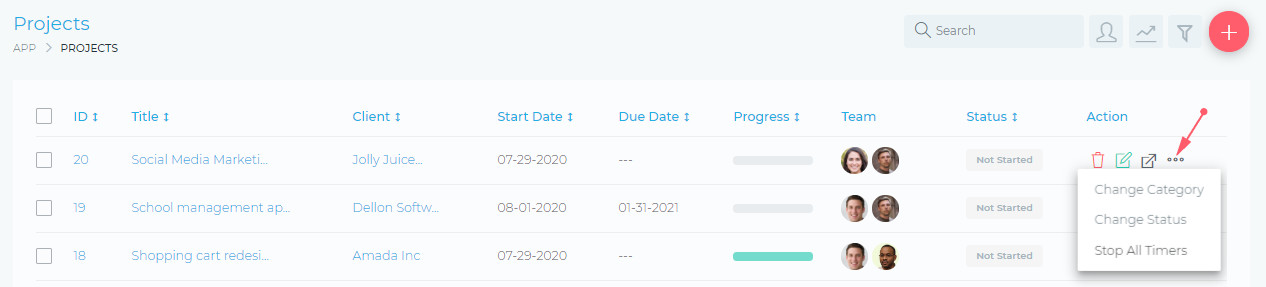
Addition Editing Options
You can access more options for editing your project, via the more icon, as shown in the image below