Installation
These instructions will guide you through installing Grow CRM (Saas Version).
The instructions show Cpanel screenhosts, however the steps will be similar for your particular web hosting control panel.
You can also use an FTP client to manually upload the files
Minimum Server Requirements
- PHP – v8.2, v8.3
- Dynamic Database Creation (via a MySQL user with permission to create new databases -OR- Cpanel API Key)
- BCMath PHP Extension
- Ctype PHP Extension
- Fileinfo PHP extension
- JSON PHP Extension
- Mbstring PHP Extension
- OpenSSL PHP Extension
- PDO PHP Extension
- Tokenizer PHP Extension
- XML PHP Extension
- MySQL Database
- GD Library >= v2.0
Dynamic Database Creation
The CRM will need to dynamically create new databases for each new customer account.
In order to be able to do this, you will need to provide any of these two items:
- Root MySQL User (or a MySQL user with database creation permission)
- Cpanel API Key
IMPORANT: The regular mysql user that you create inside your web hosting control panel is not a root user and will not be able to create database dynamically.
If you are using Cpanel, you can instead use the Cpanel API Key method (shown below).
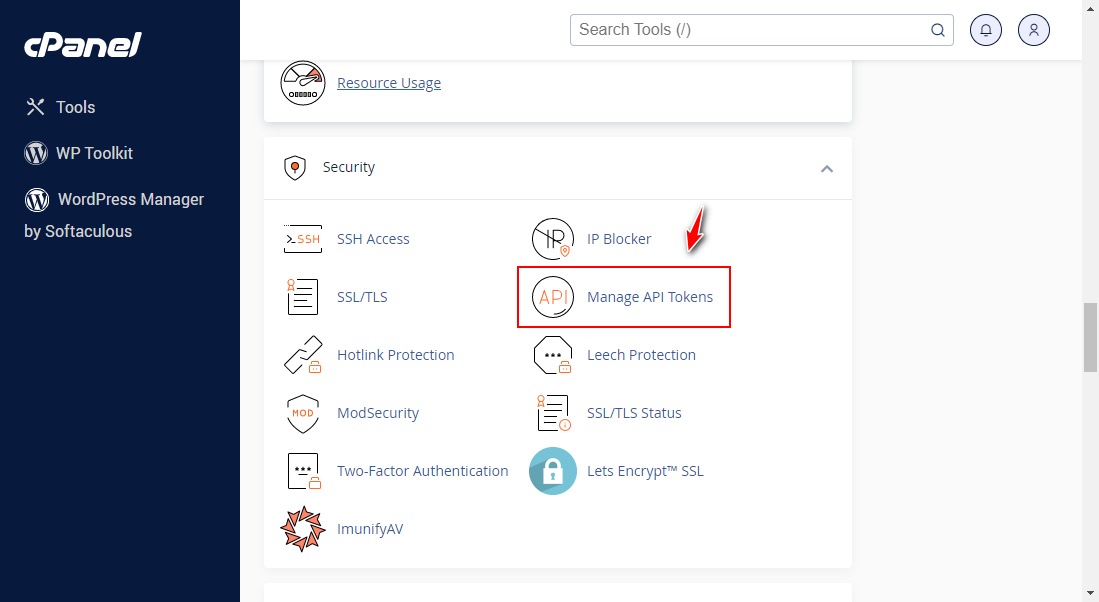
Cpanel API Key
If you are using Cpanel, the CRM will be able to create databases dynamically using the Cpanel API feature.
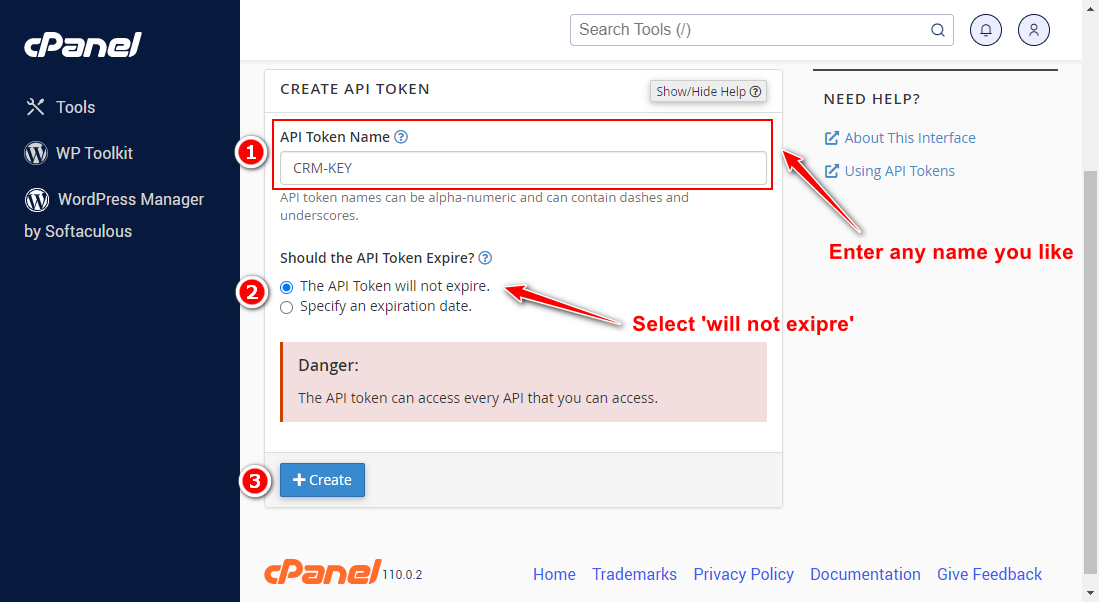
Follow the steps below, to create a new Cpanel API Key (Token).
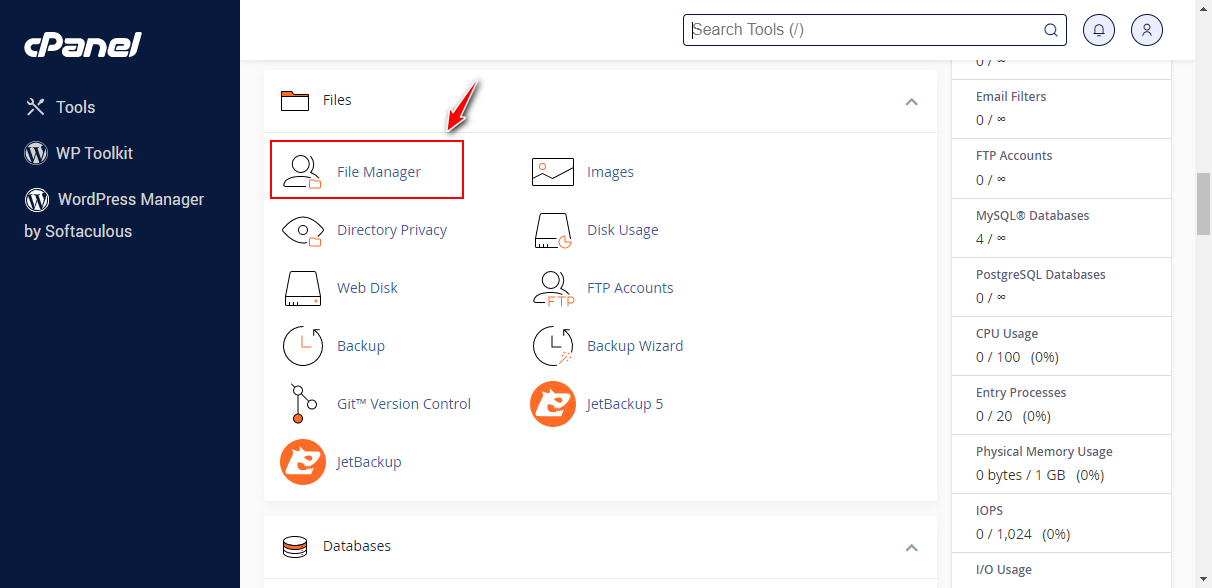
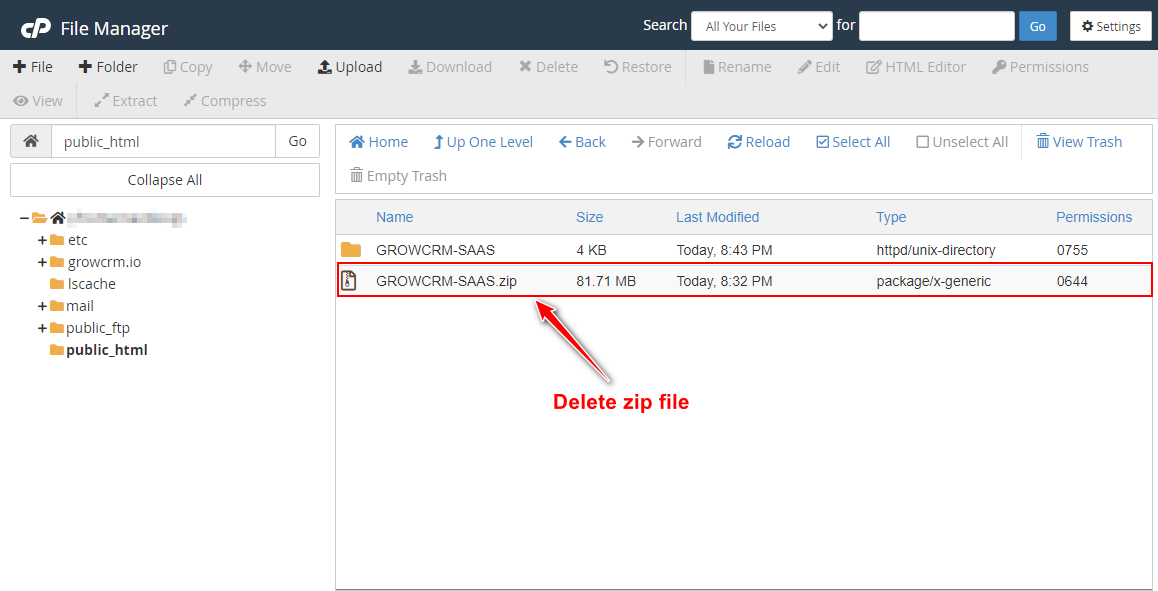
Step 1 – Unzip & Upload
- Log into your web hosting control panel
- Click on the File Manager option
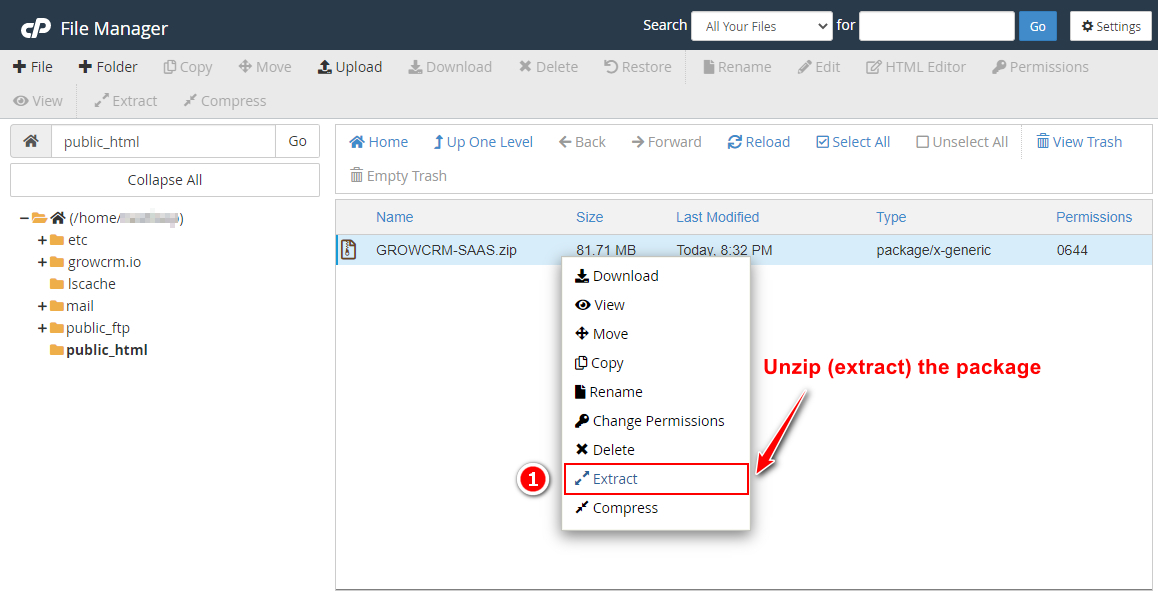
- Upload the zip package from Codecanyon
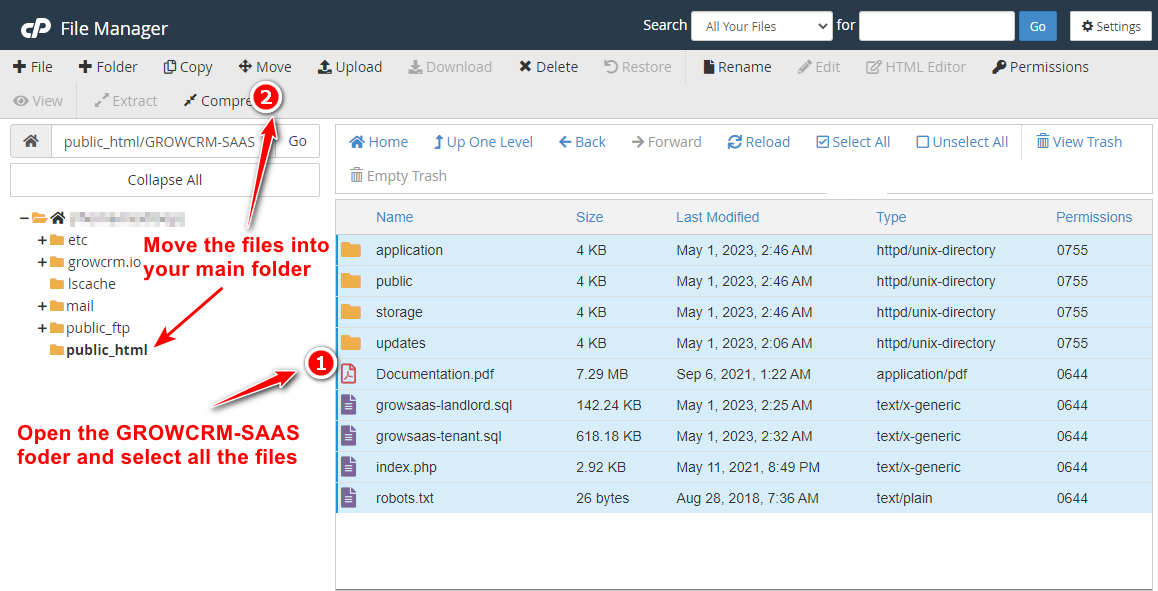
- Unzip the file
- Move all the files into your main website folder
Installation Wizard
Now open your website URL. You should now see the welcome screen of the installation wizard.
If you are getting a 404 (page not found error), please reupload a file called .htaccess (it is found in the main folder of the zip package)
- Start by entering your Product Purchase Code
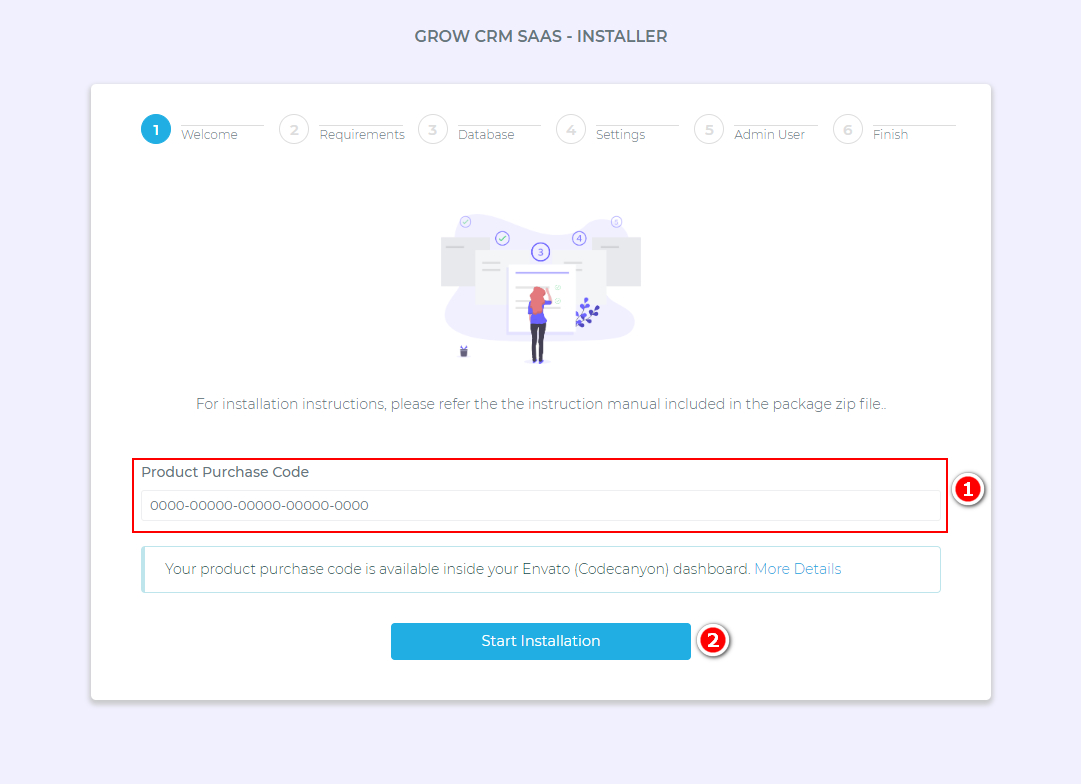
Follow the rest of the steps of the installation wizard. Instructions are provided on each screen/step.
After you have completed all the steps, you will need to do the following:
1. Create a Cron Job
2. Create a Wildcard Subdomain
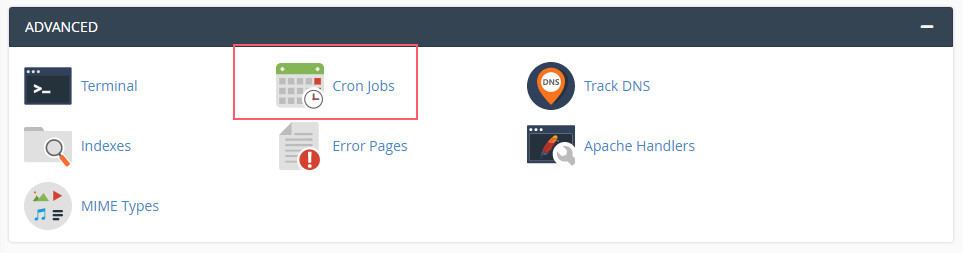
Creating a Cron Job
A Cron Job is a process that is executed by your web hosting server, in the background.
Cron jobs are used for very important tasks such as the ones listed below:
- Sending emails
- Routinely marking invoices as due, overdue, etc.
- Send invoice reminders.
- Cleaning up the system and the database.
- Generating recurring invoices, when they fall due.
- and much much more……
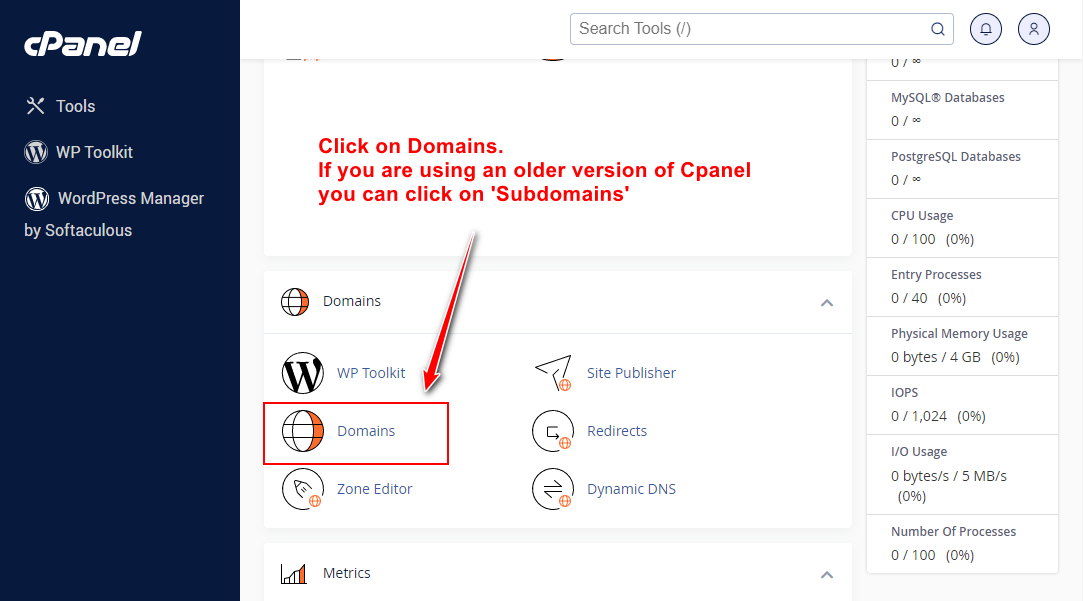
Find the option below, inside your web hosting control panel.
STEP 3
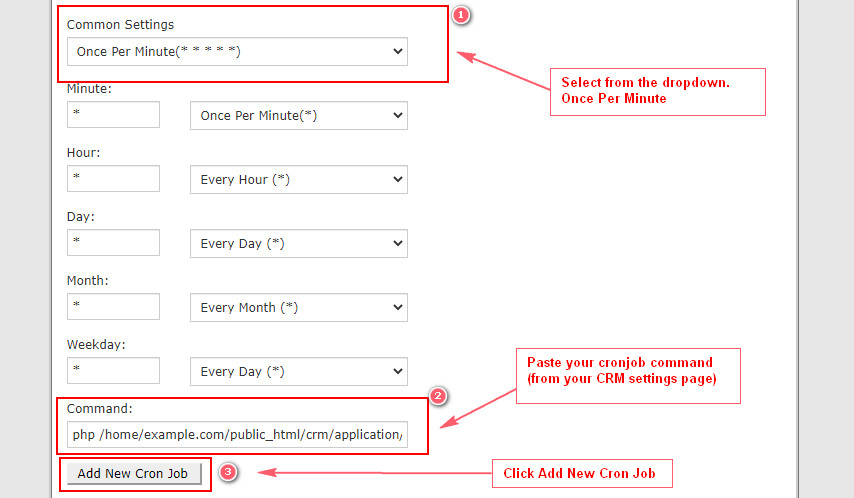
On the next screen, do the following:
- Click on the Common Settings drop down list and select Once Per Minute.
- This will automatically prefill all the other form field. You do not need to make any changes to them.
- Paste the Cron Job command (provided on the last step of setup or inside your CRM settings)
- Click the Add New Cron Job button
- Repeat the process for the second Cron Job
Wildcard Subdomain
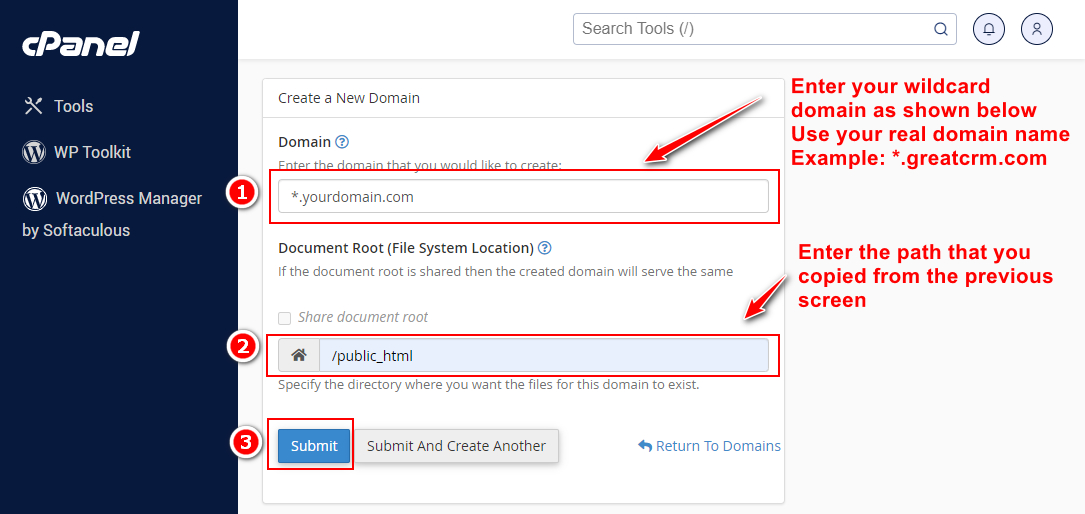
A wildcard subdomain is a special type of domain name that you will need to create inside your web hosting control panel.
A wildcard subdomain looks like this *.yourdomain.com
This means that any subdomain that is created on yourdomain.com will automatically work on the CRM. Examples:
- customer1.yourdomain.com
- customer2.yourdomain.com
- anything.yourdomain.com
- all of these will work automatically, because of the wildcard subdomain.
All Done!
You can now access your admin CRM via a url like the one shown below:
https://yourdomain.com/app-admin