Editing Invoices
Once you have created an invoice, you will now want to edit it. The section below will show you how to go about doing it.
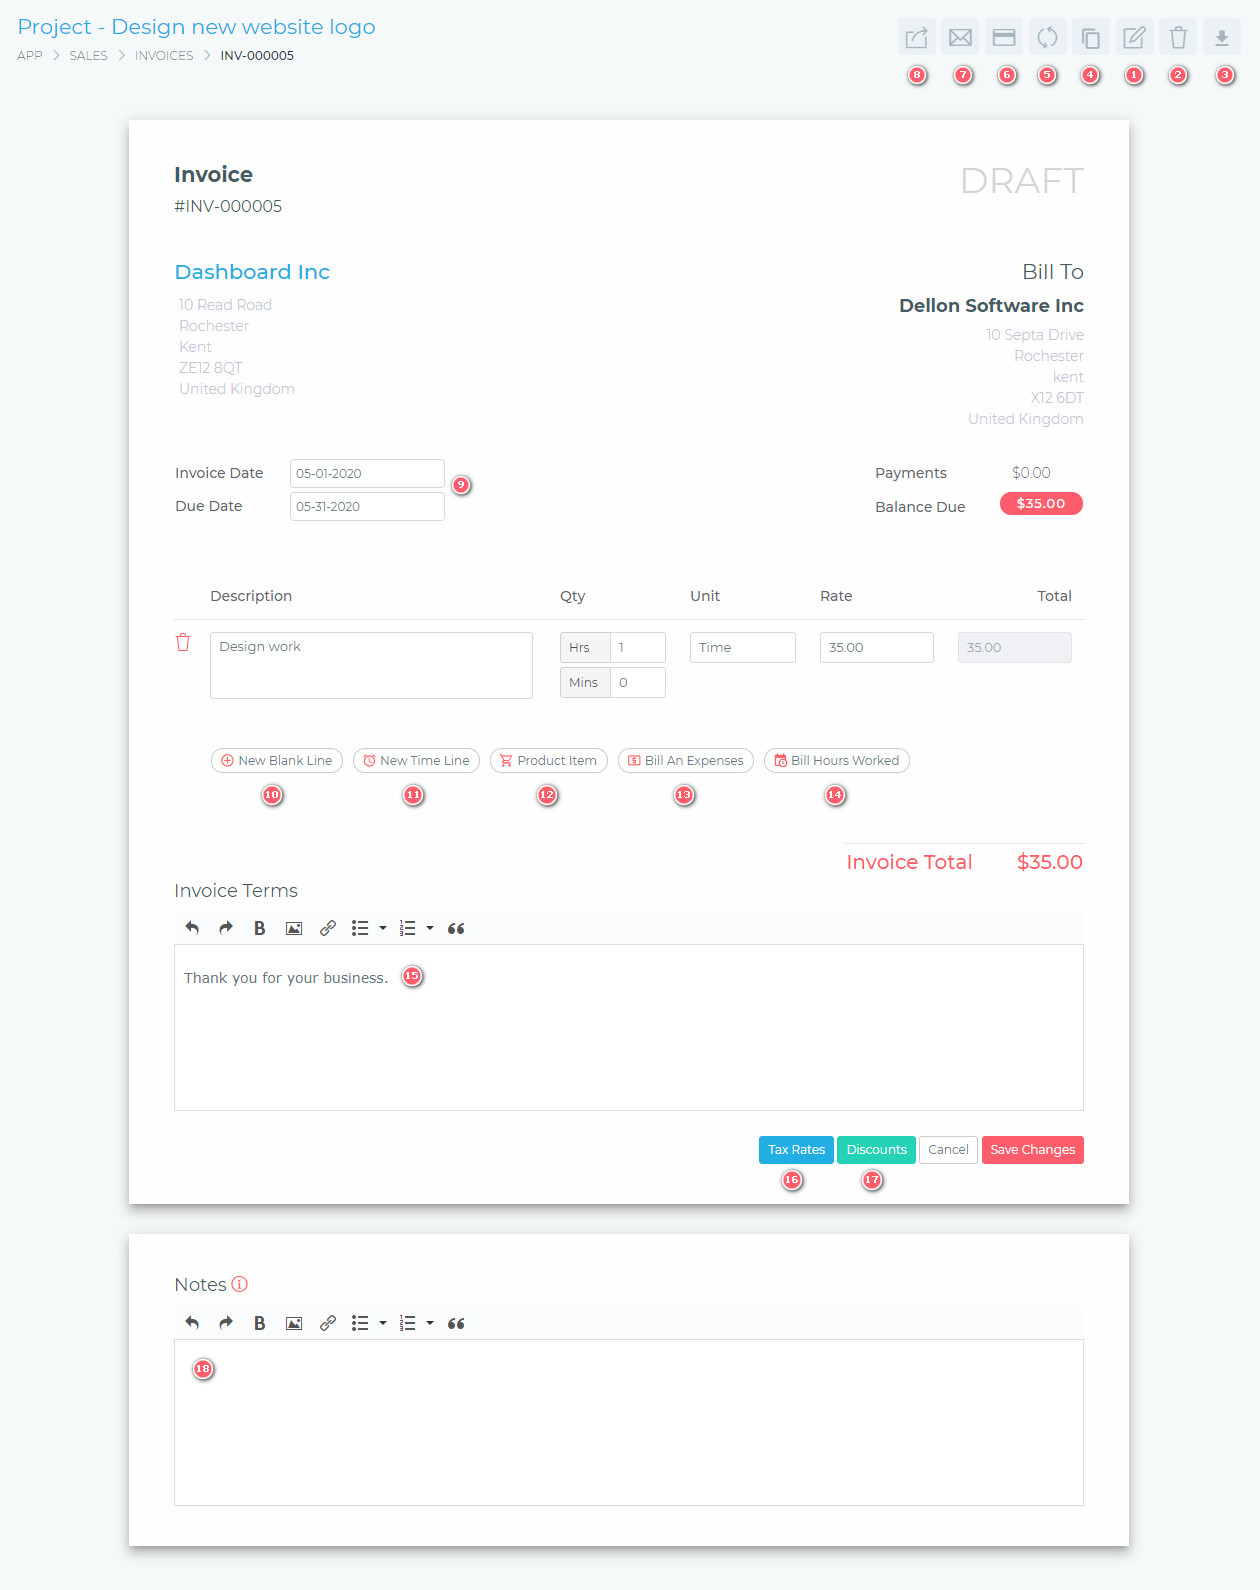
- (1) Edit invoice:
- To edit an invoice, start by clicking the edit invoice button. This will change the invoice from viewing mode to editing mode (as shown in the image above).
- (2) Delete invoice:
- When you delete an invoice, the following items will be affected.
- The Invoice’s Payments – will be deleted.
- The Invoice’s Notes -will be deleted.
- Expenses – Expenses that were billed on this invoice, will be detached from the invoice and will be marked as not invoiced. They can then be billed on any other invoice.
- Billed Hours – Any time that had been billed (i.e. time tracking hours), will be detached from the invoice and be marked as not invoice. The time can then be billed on any other invoice.
- When you delete an invoice, the following items will be affected.
- (3) Download Invoice
- This button allows you to download the invoice in PDF format.
- (4) Clone Invoice
- This feature allows you to make a duplicate copy of an invoice. You can then attach that invoice to any client or project.
- Payments will not be cloned.
- Recurring settings will not be cloned.
- This feature allows you to make a duplicate copy of an invoice. You can then attach that invoice to any client or project.
- (5) Recurring Settings
- This feature allows you to make the invoice a recurring one, or to stop an invoice from recurring. For detailed information, see the recurring invoices section.
- (6) Add A Payment
- You are able to add manual payments to the invoice.
- Payments from any enabled payment gateway (e.g. Stripe, Paypal) are automatically added to the invoice.
- (7) Email Invoice
- You can use this feature to resend the invoice to the customer. It will be the same email as the one sent when you published the invoice.
- (8) Publish Invoice
- When you create an invoice, its status is set to Draft. A draft invoice is not viewable by the client. Once you have finished editing your invoice, you can publish it. When an invoice is published, an email is automatically sent to the customer, with the invoice attached. The invoice then becomes viewable by the client.
- (9) Set Invoice Dates
- This option allows you to set invoice dates.
- (10) Add New Blank Line
- This will create a new blank line, for you to price/bill.
- (11) Add New Time Line
- Use this feature is you are specifically billing for time (i.e. hours/minutes). These are ad-hoc hours, different from hours that were logged using the time tracker.
- (12) Product Item
- To save you time, you can create a database of items that you commonly bill your clients. You can then use this button to quickly select an item to bill. To learn more about invoice products, click here.
- (13) Bill An Expense
- You can use this feature to bill your clients for any expenses that you incur on their projects (e.g. web hosting charges, materials costs, etc). To learn more about invoice products, click here.
- (14) Bill Hours Worked
- You can use this feature to bill your clients for the time spent working on project tasks (recorded using the time tracking feature). To learn more about time tracking, click here.
- (15) Terms & Conditions
- Default terms and conditions can be changed via the dashboard settings section. You can also change them on an invoice by invoice basis.
- (16) Tax Rates
- You various tax rates are created via the dashboard settings section. These tax rates are then available for applying in invoices. You can apply more that one tax.
- (17) Discounts
- You can apply a fixed or percentage-based discount.
- (18) Invoice Notes
- You can save notes which are not visible to the client.